

Starting a Voice Recording
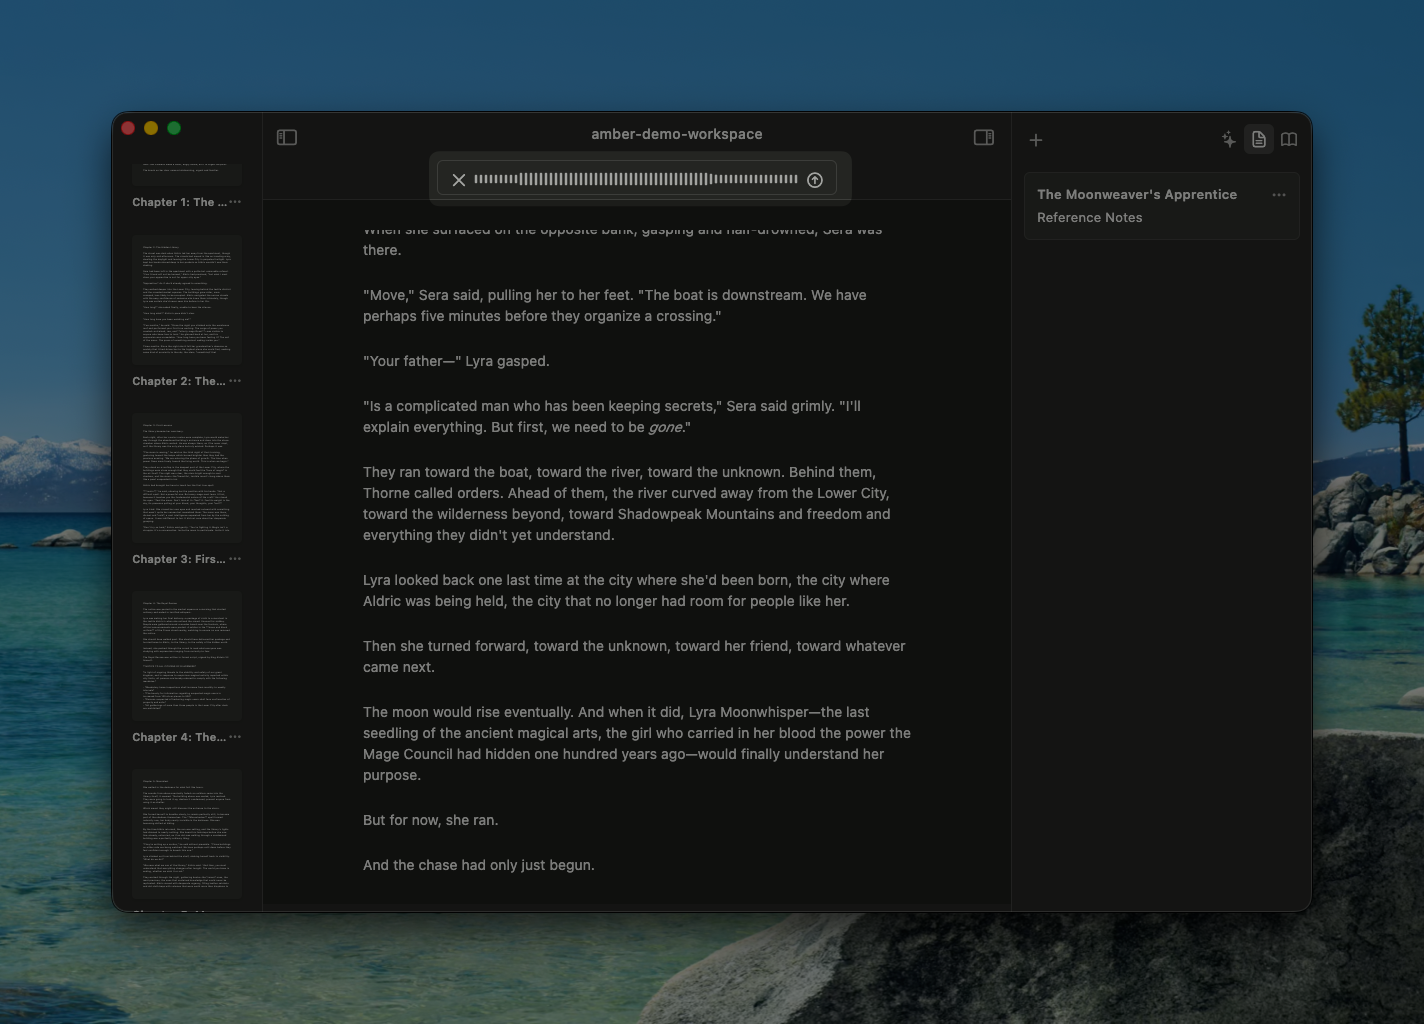
Click the microphone icon
In any section, look for the microphone icon in the toolbar or use the keyboard shortcut (if enabled).
Grant microphone permission
If this is your first time, Amber will ask for microphone access. Click “Allow” in the System Preferences dialog.
Begin speaking
Click the red record button and start talking. Speak naturally—no need to spell out punctuation or formatting.
Review transcription
Amber displays the transcription as it completes. Review for accuracy and make any corrections before saving.
How Transcription Works
Amber uses advanced speech recognition to convert your audio into text: Smart Punctuation- Automatically detects sentence boundaries and adds periods
- Recognizes question marks when you ask questions
- Adds commas, colons, and other punctuation contextually
- Handles dialogue and nested punctuation
- Capitalizes the start of sentences
- Recognizes proper nouns when possible
- Handles acronyms and special terms correctly
- Transcription includes standard paragraph breaks
- Handles multiple speakers or side comments
- Preserves emphasis and tone through word choice
- First-time transcription is fast and generally accurate
- You can correct any misheard words before saving
- The more you use voice recording, the better it understands your voice and vocabulary
Best Practices for Voice Recording
Speak naturally and clearly- Don’t artificially slow down or over-enunciate
- Use your normal speaking voice
- Amber handles various accents and speech patterns
- Pause briefly between complete thoughts
- Don’t record extremely long sessions without a break
- Shorter recordings (under 5 minutes) transcribe faster
- Quiet environments produce better transcriptions
- A nearby phone call or loud machinery can affect accuracy
- Noise-canceling features help, but quiet is still best
- Record character dialogue with emotion and emphasis
- Amber captures the tone through word choice
- You can edit dialogue after transcription for accuracy
- Review transcription before inserting into your document
- Fix any misheard words or unclear passages
- This takes 30 seconds and ensures high quality
Common Use Cases
Brainstorming Session
“I’m on a walk and want to capture plot ideas without stopping.”- Start recording your stream of consciousness
- Amber captures all your ideas with proper punctuation
- Paste into your Notes or a new section
- Review and organize later at your desk
Dictating a First Draft
“I want to write a scene but I’d rather speak it than type.”- Create a new section for the scene
- Start recording and narrate the full scene
- Pause naturally between scenes or major beats
- Amber transcribes the entire draft ready for revision
Quick Ideas on the Go
“I just thought of dialogue and want to capture it now.”- Quick recording while waiting in line or at a red light
- Short bursts (30 seconds to 2 minutes) are perfect
- Amber captures the exact wording before you forget
Meeting or Research Notes
“I’m at a meeting or interview and want to record notes without constant typing.”- Record the conversation (ensure you have permission)
- Amber transcribes key points and important quotes
- Later, organize and add to your Sources or reference material
Editing Transcribed Text
After voice recording is transcribed and inserted into your document, you have full control: Make corrections immediately- Fix any misheard words right in the editor
- Adjust punctuation if needed
- This is usually just a few quick edits
- Ask AI to refine the writing style (make it more formal, poetic, etc.)
- Use the AI editing feature to improve phrasing
- Ask for grammar and clarity improvements
- Combine voice-recorded sections with typed sections
- Use voice for rough drafts and manual editing for polish
- Switch between voice and keyboard as needed
System Requirements
Voice recording is available on:- macOS 26+ (using Apple’s SpeechAnalyzer API)
- iOS 26+ (using Apple’s SpeechAnalyzer API)
- Older versions: Limited functionality with graceful fallback
Technical Details
Language Support- English (US, UK, and other variants supported)
- Additional languages may be supported based on your system settings
- Uses your Mac’s microphone (built-in or external)
- Works with USB microphones and wireless headsets
- Better microphones produce better transcriptions
- Voice recordings are processed using Apple’s SpeechAnalyzer API
- Audio is not stored permanently—only the transcription is saved
- No audio is sent to external servers (processing happens locally on your device)
- See Privacy & Data for complete information about how we handle your data
Troubleshooting Voice Recording
Microphone not detected- Check System Preferences > Security & Privacy > Microphone
- Ensure Amber has microphone permission
- Try a different microphone if available
- Restart Amber and try again
- Try speaking more clearly and at normal pace
- Reduce background noise if possible
- Check that your Mac’s language settings match the language you’re speaking
- Correct the transcription manually before saving—this is often quicker than re-recording
- Your Mac may have interrupted recording—check System Preferences
- Very long recordings (20+ minutes) may need to be split
- Try recording in shorter sessions for better results
- Check your microphone volume level isn’t too high
- Try a different microphone if available
- Restart the recording—there may have been a temporary issue
Keyboard Shortcuts
- Start/Stop Recording: Microphone button in toolbar, or custom shortcut if configured
- Cancel Recording: Escape key during recording preview
- Insert Transcription: Return key or “Insert” button
Related Guides
- Document Setup - Configure your workspace
- Text Formatting - Format your transcribed text
- Amber Copilot - Give instructions for voice transcription
- Amber Copilot - Refine transcribed text with AI assistance